

Note Oulim Player NAS isn’t released yet, so it can’t be installed right now. The image will be published when the app launches — you can follow this guide then.
Note This is a beta. We’re still checking it on different NAS models, so you may run into unexpected issues. If something goes wrong, use Report a problem at the bottom left of the admin page. The NAS server’s log goes with it, which makes the cause easier to find (addresses and paths are masked).
What you need
- A NAS that runs Docker (containers) — Synology Container Manager, QNAP Container Station, or a Linux machine with Docker installed
- A 64-bit CPU — Intel/AMD (x64) or ARM64. 32-bit ARM NAS models aren’t supported
- At least 1 GB of free memory (2 GB or more recommended)
- Phones, tablets and TVs on the same Wi-Fi with Oulim Player installed
Tip If you have a PC that’s always on, you can install Oulim Desktop on it instead — it does the same job. See the “Use your PC as a NAS” guide.
1. Prepare the compose file
Copy the text below. You only need to change the two lines marked with <- to match your NAS.
services:
  oulim-player:
    image: <published at app launch>
    container_name: oulim-player
    network_mode: host
    user: "1000:1000"              # <- your NAS user id (id -u : id -g)
    environment:
      - OULIM_NAME=Oulim NAS
      - OULIM_MEDIA=/volume1       # folders you can add in the admin page (several: /volume1:/volume2)
    volumes:
      - ./config:/config
      - ./cache:/cache
      - /volume1:/volume1:ro       # <- your video storage, read-only
restart: unless-stopped| Line | What to enter |
|---|---|
| user | Your NAS user ID. Connect to the NAS over SSH and run id — you’ll see something like uid=1026(…) gid=100(…). Enter those numbers, for example "1026:100" |
| /volume1:/volume1:ro | The top folder of the storage that holds your videos. Use the same NAS path on both sides. :ro means read-only, so Oulim can’t delete or change your videos |
| OULIM_MEDIA | Where you can pick library folders in the admin page. Use the same path you mounted above |
| OULIM_NAME | The name shown on phones and TVs (you can leave it as is) |
| NAS | Storage path examples |
|---|---|
| Synology | /volume1 · /volume2 … (USB drives: /volumeUSB1/usbshare) |
| QNAP | /share/CACHEDEV1_DATA · /share/CACHEDEV2_DATA … |
| Other Linux | Where your video disk is mounted (e.g. /mnt/media) |
Tip Have more than one storage volume? Add one more line under volumes for each, and join them in OULIM_MEDIA with : — for example OULIM_MEDIA=/volume1:/volume2
Note Don’t mount the whole NAS (/) — system folders would show up too. Mount only the storage that holds your videos.
2. Run it
Create a folder on the NAS where Oulim keeps its settings (for example docker/oulim). When you run compose from that folder, config and cache folders are created inside it.
| NAS | How to run |
|---|---|
| Synology | Container Manager › Project › Create → pick the folder as the path → paste the copied text into Create docker-compose.yml → Done |
| QNAP | Container Station › Applications › Create → paste the copied text as YAML → Create |
| Other Linux | Save it as compose.yaml in the folder and run docker compose up -d |
- Synology guide: Container Manager › Project ↗
- QNAP guide: How to use Container Station 3 ↗
- Linux: Install Docker Engine ↗ · Install Docker Compose ↗
Tip Menu names on the NAS may differ slightly between DSM and QTS versions. Check the official guides above for screenshots.
3. First-time setup
- On a PC on the same Wi-Fi, open
http://NAS-address:45800in a browser. You’ll see First-time setup. - Find the Setup code in the container log — on Synology, Container Manager › Container › oulim-player › Log; on Linux,
docker logs oulim-player. - Enter the setup code, choose an admin password (at least 8 characters) and select Get started.
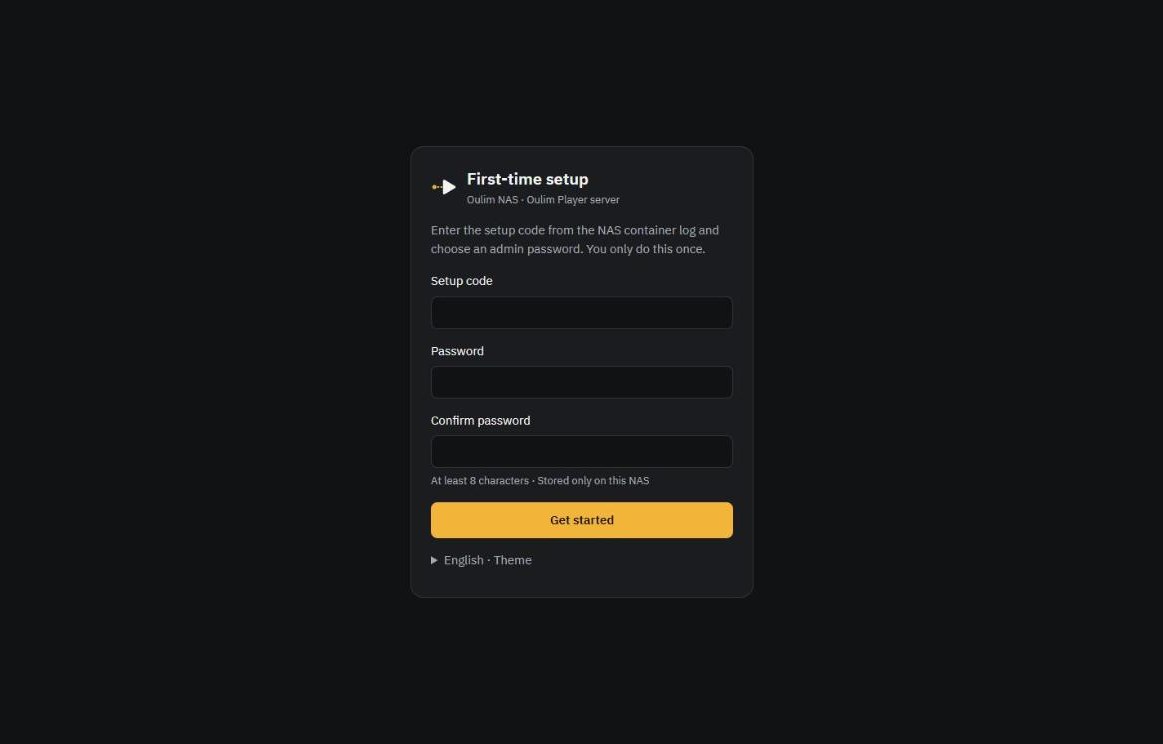
Tip The admin page only opens on your home network. The password is stored only on this NAS.
4. Add library folders
- On the Library tab, select Add folder.
- If you have more than one storage volume, pick one at the top, open your video folder and select Add this folder.
- Organizing starts right away. Posters and plots fill in as each title is done.
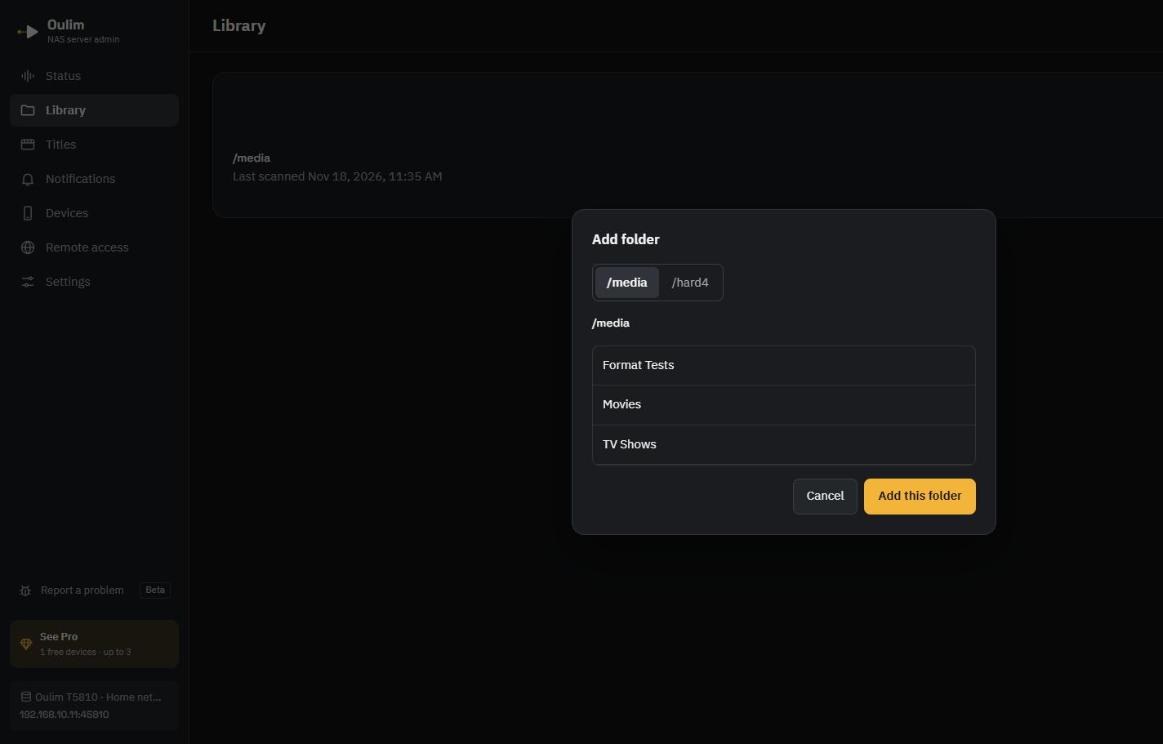
Folder naming tips are the same as in the “Organizing your files and folders” guide. When you add or delete videos in the folder, Oulim picks up the change on its own.
5. Add your phone, tablet or TV
- Admin page: on the Devices tab, select Add device. A QR code and a Pairing code appear.
- Phone: on the Network tab, tap the QR icon at the top (Add my PC) and scan the QR code. On a TV, enter the pairing code on the same screen.
- Admin page: when the request arrives, check that the confirmation codes on both screens match and select Approve.
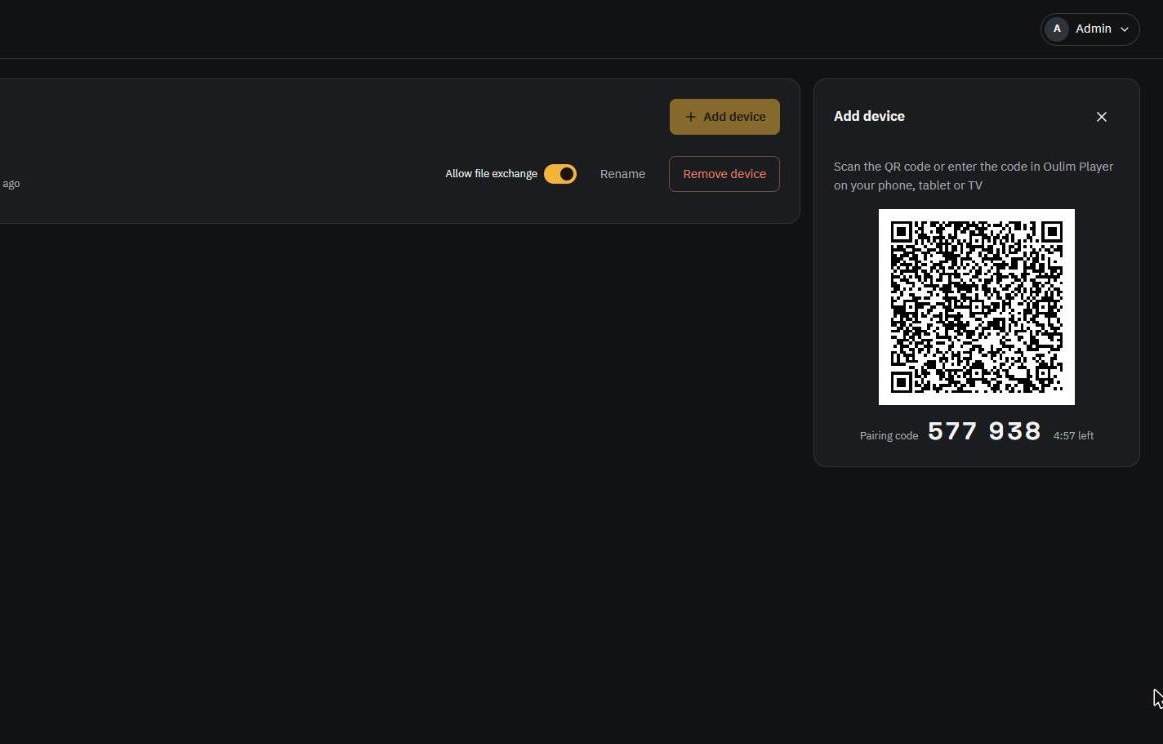
The NAS appears on the Network tab of the device you added, and its videos show up in Home and Library.
Tip If you also use Oulim Desktop on a PC, don’t add this NAS folder to the PC’s library over SMB as well. To watch on the PC, register the PC with this NAS just like a phone. If you already added it, the PC won’t relay that folder to your devices — so the same videos don’t show up twice.
Watch away from home (Pro)
Choose how to connect on the Remote access tab of the admin page. If your router supports automatic port opening (UPnP), Oulim opens the port for you. See the “NAS and network connections” guide for details.
Tip Remote access is off at first (home network only). Even when it’s on, only the one port your devices connect to is opened on the router — the admin page is never opened to the internet.
Tip If you use a NAS and an Oulim Desktop PC together, each needs its own external port on the router. When ports open automatically, Oulim picks a free number (45810 · 45811 …). If you forward ports on the router yourself, use the External port shown on the Remote access tab — for example, PC 45810 and NAS 45811.
Updating and stopping
- To update, pull the new image and run it again. On Synology, Stop → Build (pulls the image) → Start the project; on Linux, run
docker compose pulland thendocker compose up -d. - Settings, registered devices and your organized library stay in the
configfolder, so they’re kept when you update. - Oulim starts again on its own when the NAS restarts — unless you stopped it yourself, in which case it stays off.
Hardware transcoding (optional)
A NAS with Intel (Quick Sync) or AMD integrated graphics can convert 4K videos to 1080p as it streams them. Oulim checks whether it can do this every time it starts — see the transcoding line under Status in the admin page.
Docker doesn’t give containers the NAS’s graphics device by default, though. Add the two lines below above the restart line in compose to allow it. On a NAS without a graphics device, these lines stop the container from starting, so remove them — videos then play as they are.
    devices:
      - /dev/dri:/dev/dri
Troubleshooting
| Problem | What to check |
|---|---|
| My phone doesn’t see the NAS | That both are on the same Wi-Fi, that compose has network_mode: host, and that the NAS firewall doesn’t block UDP 45809 or TCP/UDP 45810 |
| The folder I want isn’t in Add folder | That the storage is mounted under volumes in compose and the same path is in OULIM_MEDIA |
| Videos don’t show up or aren’t organized | That the NAS account can read the video folder — it’s the account whose number you put in user in compose. In the NAS file manager, that account (or its group) needs “read” permission on the folder |
| The container won’t start after adding hardware transcoding | The NAS has no graphics device (/dev/dri). Remove the two devices lines and run it again |
| I run two Oulim NAS servers on one machine and the second admin page won’t open | The admin page port (45800) is taken. In the second compose, add a different number under environment, such as OULIM_ADMIN_PORT=45801, and open http://NAS-address:45801 |
| I lost the setup code | Restart the container — it shows up in the log again (until first-time setup is done) |